Custom Jewelry For Any Occasion…
Signe's Metal Clay World
Latest works, process, sucesses, failures, discoveries and everything in between...What exactly is Metal Clay?
If you have questions regarding prices or general inquiries and have trouble accessing my online shop, please contact me here
Working with PMC Pro
December/15/2010 07:57 PM Filed in: Commissions | Rings
Detailed steps on my first experience with making a ring using PMC Pro and my analysis of the product.
I have been wanting to work with pro before its release in October of 2010 but I didn’t really have an excuse and I had been putting it off to learn other things about metal clay. Then suddenly, I got a commission request from Etsy to do a ring and I felt that there was no time like the present. I really did not want to use anything other than Pro for a ring because I had used PMC3 prior and the ring I made was losing its shape and showing signs of wear and tear. The ring to be made was supposed to be for a man, who would likely wear it frequently and might not give it the same kind of gentle love and tenderness that some of us might give to our jewelry. I had to take this into account when designing the piece. So it was time to break open the Pro and experiment. I must say that I could not have proceeded as quickly without the wonderful document provided by Hattie Sanderson on the Metal Clay Guru Website.
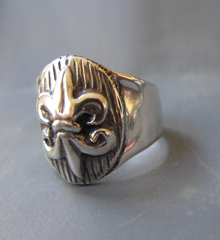
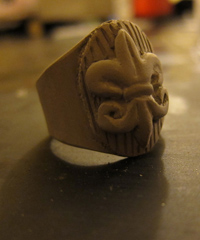
The clay itself was very nice to work with. It was a little sticky at first. I used a small amount of badger balm on a 2 part silicone mold of the fleur de lis and had no problem releasing it and cutting off the excess even though I rolled the Pro out to only 2 cards thick before pressing it in. I let it dry and then refined it to add to the other portion later. I made the dome shaped portion next. I did this in the same way as you would for making a half a lentil bead. I domed one half and oval shape and let it dry and then using slip, I added my fleur de lis insignia. I also made this 2 cards thick. I then set these aside to dry. Next, I cut out the shape for the ring shank. I just made up my own design because it needed to be a lot larger than anything I had on hand. I also planned out the size of the lentil bead portion and the ring shank portion so that the patterns I would be cutting would shrink to match.
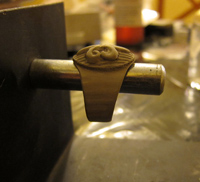
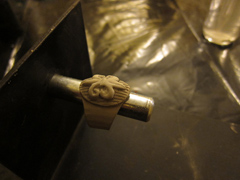
Using a piece of teflon sheet taped around a roll of paper the size of the man’s ring, I attached the ring shank from one end to the other with some slip. Next you want to let the ring dry to prepare to adhere the top portion of the ring to the shank.
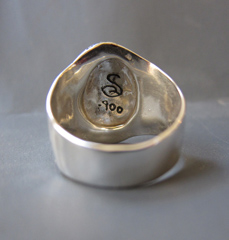
A CAUTIONARY NOTE: I made a mistake the first time round and I attached the two pieces with slip and then proceeded to dry them but then realized that a giant bulbous form was developing underneath the shank. Ah, yes...the air pocket! Before drying the ring shank, I would recommend cutting out a nice oval shape from the top of the shank and finishing the back of your lentil insignia with a cool design or something before attaching it to the shank.
At this point I did a lot of my detail work. I added the line work and sanded in areas that I wanted to have a mirror finish.
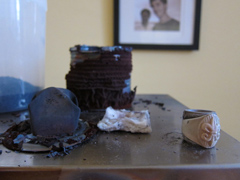
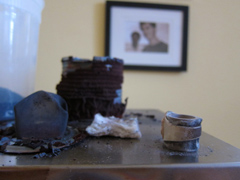
I fired in a dental kiln that reaches up to 2,000 degrees F. I Love this photograph! It looks like pure destruction. I was kind of shocked at first. I thought the can had been totally destroyed but it turns out that it was just the outer layer. Most likely some chemical on the outer most layer? Perhaps a layer of the steel itself? Considering that the ring was not actually touching the carbon, I was impressed with how well it stayed clean and free from fire scale. There was only one little section on the bottom of the ring shank. I actually did not have any pickle at the time so I just let it cool naturally and then removed ring stopper and ran it under cold water. Then I began the finishing process.

Overall, I’m impressed with PMC Pro’s performance for certain things. After work hardening it, it is very strong. I only made this piece 2 cards thick and yet it cannot be bent between my thumb and forefinger. I think that it will be extremely useful to use this anytime you are making ring shanks or clasps or findings of any kind. On the other hand, it does not really withstand dings and dents as well as I had hoped. Pro doesn’t really seem any better than PMC3 in that respect. That was a little disappointing. Perhaps I am off in my assessment here and perhaps its just the nature of silver but if this is as good as it gets, I would stick with PMC3 for the decorative aspects and go for the Pro for the functional portions.